Thursday 27 December 2012

Grandad's lorries

During the Christmas holidays I had time for a little research in the family archives. The result is as series of images showing some of the lorries belonging to the brick works where my grandad worked during the 1940's. I have mentioned my grandad in previous posts. See him drive a 600 mm loco or take a look at my model of a thresher and tractor - also inspired by my grandad's work in rural Denmark.

Grandad posing in front of lorry number 2 from P. Bolvig (the owner of the Orebo brick works). The lorry is equipped with a gas generator and from the writing on the filter box behind the cab it seems to be a 'Vulkan'. Grandad is wearing the characteristic apron worn by many lorry drivers. Photo from 1940-1945.

Another P. Bolvig lorry (reg.nr. E 1734) shortly after the war. The lorry (a Ford AA?)  is hauling peat to be used as fuel in the brick oven. A few years later my grandad left the brick works to become a full time lorry driver for one of the peat factories around Bodal, hauling peat by lorry to Copenhagen.

Grandad and one of his colleagues in front of lorry no. 5 (reg.nr. E 1789) during the war years. Note black out-lights, gas generator and the general worn down appearance of the lorry.
I'm not a lorry expert and identifying the lorries will take help frome someone more into those matters. Anyway, I'm slowly working up plans for a model of one of my grandad's lorries. The most likely candidate to be modelled is the one that I suspect is a Ford A. The basis will probably be either the Eastern Express Soviet GAZ-AA or the new MiniArt GAZ-AA.

Saturday 22 December 2012

Looking Back on 2012 (1/35)

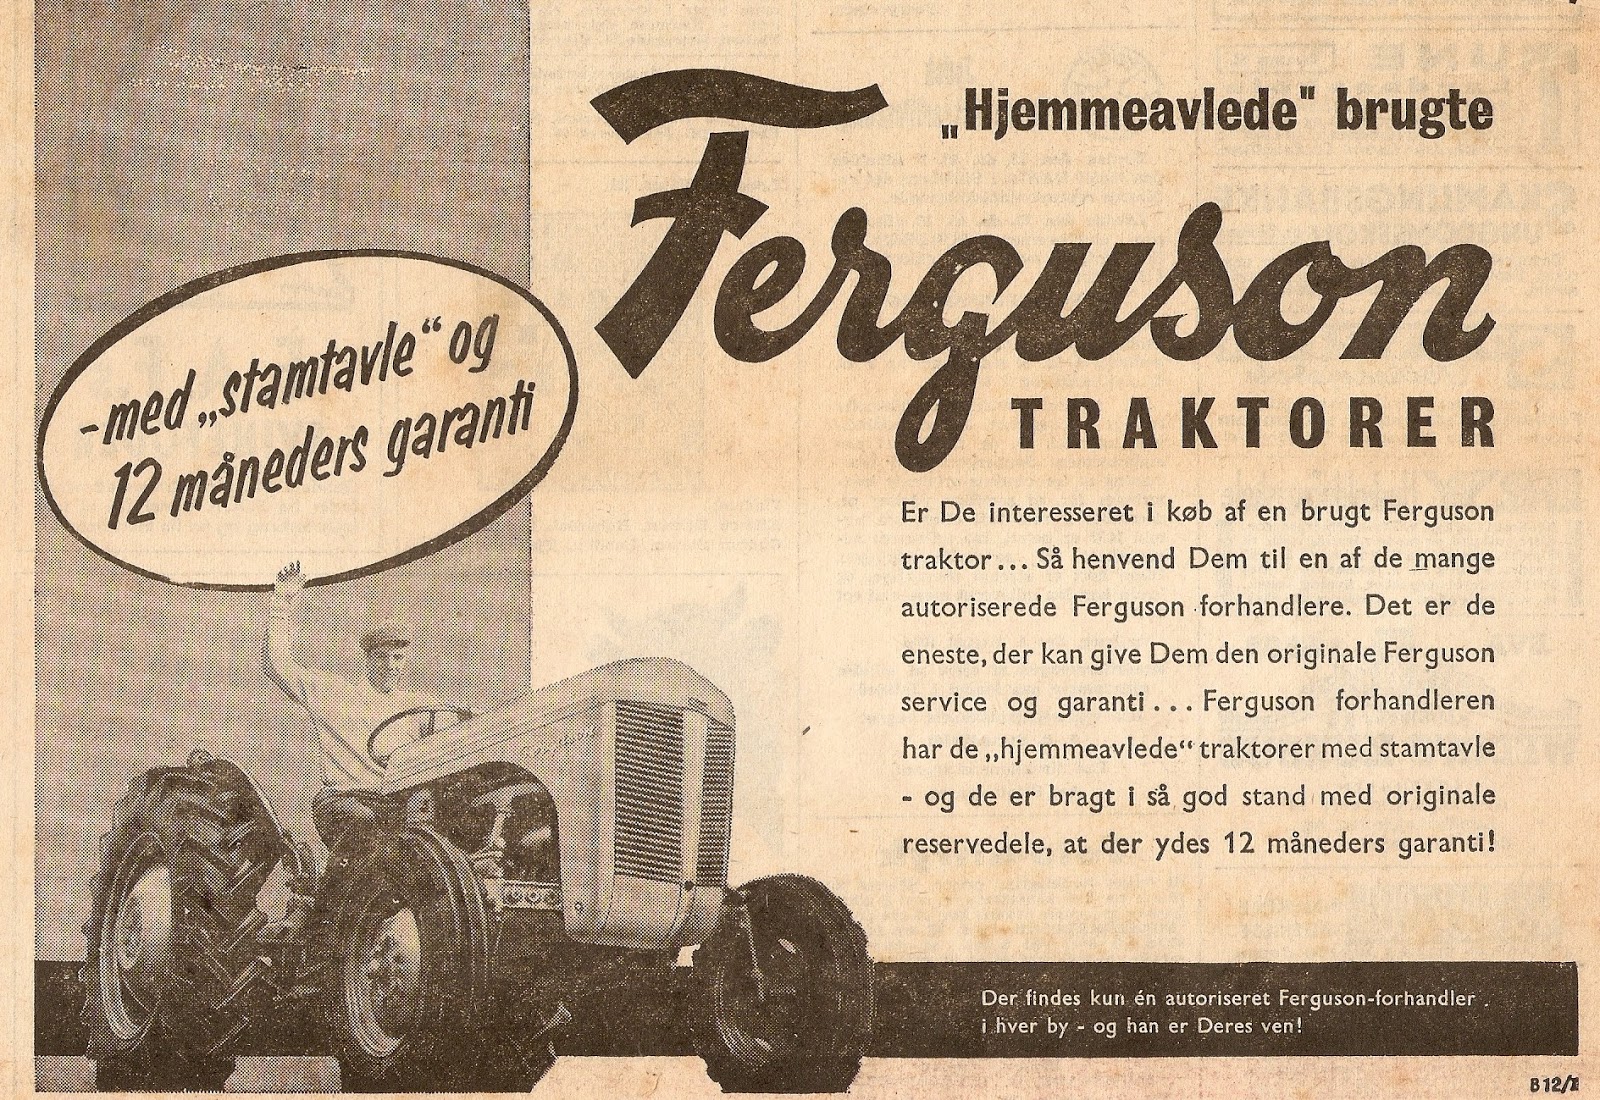
Although by all means busy work vise 2012 still turned out to be a productive modelling year. Perhaps a busy work life requires relaxing at the work bench? And no, you won't see me write a best seller for the management bible-section titled '101 railway modelling tips to further your career' or 'Big Bucks - How toy trains made me realise my business potential'. I'd much rather spend my spare time modelling. At the moment I'm nearing the stage where my Ferguson tractor is ready for primer paint.

Looking back on 2012 I really cannot complain. I've been exhibiting Nystrup Gravel, finished a record high number of models, visited several narrow gauge railways abroad, 'researched' the history of Nystrup Gravel in almost forgotten archives - and started this blog. Recently I have begun studying the blog statistics and I'm amazed that so many visitors drop by and from such a variety of countries.

Most of what I built during 2012 is described on the blog - so by running through the posts anyone with enough energy and patience (or nothing better to do) can see how I spent my modelling year. The three things I count as most important are Nystrup Gravel's participation in the Gauge 1 exhibition in April, the work with both old and new skips and my research into the history of the gravel company and it's railway.

The exhibition was great because I rarely have my modules set up for running. All the comments and questions from the visitors gave me a lot of inspiration and motivation. Running trains for days almost non stop is quite fun and I approach retirement (in 30 years time) with no fear of boredom.
Nystrup Gravel with an interested visitor allowed behind the scenes to inspect rusting scrap behind the shed. It's me in the background so graciously made unrecognisable by the visitor. I 'harvested' the photo on the web. I beg the photographer to forgive me - and I will not hesitate to remove the photo or credit the photographer.
My work with skips is also on my top 3 because they are such an integral part of a Danish industrial railway. Even to the extent that skip is part of the Danish popular word for an industrial railway 'skip railway' ('tipvognsbane' in Danish). And because skips are plentiful, normal and boring they should be the foundation of any model of a small Danish railway like Nystrup Gravel. Many (modellers and others) are drawn to subjects that are unique and colourful, but my model railway is supposed to look like the prototype did in the 1950's - dull, boring and normal.
Long lines of loaded skips at a chalk quarry on Sealand, Denmark. Most likely Sigerslev chalk quarry. Nystrup Gravel never had quite so many skips. From the archives of Bent Hansen.
The unearthing of Nystrup Gravel's history is important in many aspects. I have always liked to know the history behind what I model and it is my impression that readers of the blog easier will be able to tie my different modelling projects together when there is a history of the subjects. The history of the gravel company and the surrounding countryside will be as boring as skips and reality. 
One of a few folders I have had the opportunity to check in my quest for information on the little gravel line. This contained a spare parts list for an O&K excavator type L 3. If any excavator of that type actually worked at Nystrup Gravel is still to be determined.

I wish you all a merry Christmas and a happy New Year.

Monday 17 December 2012

Blisters and Ferguson (1/35)

I have yet to get blisters from modelling, but volunteering on HVB (a real railway with 700 mm. gauge) has often provided me with blisters - large ones! This week I did another half day's work of moving snow to open up HVB for the christmas trains. And managed to get a blister from the shovelling. But work was great and fighting snow drifts two feet high isn't something I get to do everyday. See a pictorial on HVB's blog.
Last week's sunny weather didn't repeat itself...
Home again and with feet warmed up, I got to do some minor work on my Ferguson model. I fitted axles, engine details and the patented Ferguson three point linkage. Next up is brakes and steering system.
 
It begins to look like a tractor!
 

Sunday 9 December 2012

Clearing Snow

Well, not on Nystrup Gravel of course. 'My' other and much more important railway is in 1:1 scale (700 mm gauge) and needs a lot more work than a 1:35 railway. On Hedelands Veteran Railway (HVB) christmas trains run every weekend in December. Points and guard rails at road crossings needs to be cleared from snow. If not done properly there is a risk of derailing - and on a 1:1 railway that is far more serious than at home.

Sunny, blue sky and a nice cover of white snow. Clearing away snow in guard rails at a road crossing.
Before the first train's departure I took off as part of a small team at 8 o´clock to clear the line. After the first ten minutes of work, you don't feel the cold anymore! We hadn't much time for the work as we had to clear the line for the first passenger train. Fortunately the snow was fresh and powdery and didn't take much effort to remove.
The sun rises above the hills around Hedeland and makes for some spectacular morning views.
The working on a 1:1 museums railway gives a great sense of achieving something important together with likeminded enthusiasts - and providing great expiriences for all the visitors. And having a railway at hand to provide knowledge of how things work in reality gives great possibilities for a modeller to enhance the realism of the little railway at home. Consider if you could make a contribution to a heritage railway near you. You will make a lasting difference, meet great people and bring home lots of inspiration to your model railway.

Da 7 (Henschel 18449/1921) pulls out its string of wagons for the second departure of the day. Steam in a snow covered landscape is something quite special.
Follow the christmas traffic on HVB through this blog. It is updated 2-3 times a week in Danish language. For non-Scandinavians probably 'all greek' but the images says more than a thousands words.

Saturday 1 December 2012

The Ferguson - A Tractor Icon (1/35)

To me the most iconic tractor ever built is the grey Ferguson. No Danish model railway in the fifties should be without one (or two or three). And naturally the small roads around Nystrup will not be without their example(s). My Ferguson is a kit from Tractor Models Co. in white metal. I think you can have pre-assembled models of Fergusons from Britains and other producers, but none with detail or definition that matches the kit. And assembly is quite straight forward, really.
As far as I got without instructions. Now I can begin fitting all the lovely details. The Ferguson badge is from a scrapped tractor - not part of the package from Tractor Models!
I started my Ferguson TEA-20 kit some time ago, but didn't dare to proceed too far as I had somehow mislaid the instructions. Normally not being overly sensitive following manuals (any!) or assembly instructions, in this case I didn't want to risk messing up a Ferguson. Luckily Model Tractors supplied a new set of instructions without fuss.

Commercial from 1959 on the virtues of the Ferguson-tractor. The local dealer of the tractors is labelled as the farmer's friend (as if the dealer wasn't there to make money...)
When choosing which period magazine clipping or old commercial should illustrate this post I almost couldn't make up my mind. My archive is full of images and clippings - not to mention all the stuff available on the internet. The Ferguson was the first tractor I learned to drive as a boy. Having recently visited one of my university's experimental farms I was treated to a ride in a GPS-controlled tractor. Even though the ride was great (and somewhat scary: driving through a field not touching the steering wheel is sort of unnatural) it wasn't half as fun as the Ferguson.

Sunday 25 November 2012

Flat wagon for the speeder (1/35)

As the speeder isn't capable of carrying much besides a crew, I have hurried to put together a flat wagon to carry tools etc. It is the frame of a Scale Link skip fitted with floor and ends from plastic card. The floor was made to look like it was covered with steel sheet - one half with tread plate pattern.

The speeder shunting in front of the shed. Preparations for work on the line, it seems.
The little wagon is painted in different colours and weathered to appear well used. When painting one of the floor panels I used a Vallejo paint called 'flat earth'. I thought that the idea of a flat earth disappeared centuries ago! In my paint drawer I also found another paint with the amusing name 'skin' - a sort of light pink. It may fit the skin colour of most native scandinavians, but for at least two thirds of this planet's population the colour will bear no resemblance to the colour they see in the mirror (if they've got one). So much for paint names - I'll carry on with the small flat wagon!


Half an hour later the flat wagon is loaded with warning signs. Two workers wait for a colleague to fetch some shovels before driving off to the work site.
The small flat wagon is loaded with some freshly painted warning signs to be reerected along the line after repair and repainting at the loco shed. The signs are etched and available from Freja Modeltog - a small Danish manufacturer. I fitted most of the signs to a length of used rail by soldering and a few to a wooden post with two part epoxy. The hardest part was painting the signs and getting red paint only on the raised lettering. I still don't have any road crossings to erect the signs at, but I like to be well prepared!

Tuesday 13 November 2012

Speeder Finished (1/35)

The speeder is finished. There may still be a small detail to add, but I now move on to other projects. The speeder is painted in acrylics from Vallejo and weathered with oil paint and home made chalk powder. I still haven't bought any of the newer colour pigments, even though several of them have received positive comments in reviews. Call me old fashioned... The numbering is made to look like two enamel signs normally used for numbering houses. Very appropriate I think, as the vehicle looks like a shed.
The speeder parked at a tree line. The paint repairs around the rebuilt radiator can just be made out. The speeder was originally fitted with a motor cycle engine. After the engine refit a larger radiator was needed. It also meant that part of the door was cut away.
Spare rails. Perhaps the crew is looking for a length of rail for urgent repairs of the line?
When I have looked at prototype wagons and skips with wooden frames there seems to be no end to the number of iron fittings. I have tried to recreate that look on my 1:35 speeder. Most fittings are made from plastic card and glued with two-component glue. Rivets and bolts are made from my little rivet punch and glued in place with AC glue.

The roof is dressed in my favourite tarpaper material, micro pore tape. It's a tape from the health industry made to position and fix bandages and still allow the skin to breathe. When painted it retains a slightly rough surface which resembles tarpaper. The tape is self adhesive, so it's easy to attach. The tape doesn't seem to loose its grip over time. I have had tape on a roof now for more than five years without any 'slipping'.

The previous post on the speeder covered the electrical parts. Earlier posts can be found here:
Drawing and the first plastic cut
Parts cut out and ready for assembly

For those who care, even more images of the speeder's construction can be found in the Flickr work bench-folder.

Tuesday 30 October 2012

Having a break (1/35)

Most railways have a quiet spot where fitters, workmen and loco drivers can have a break. Nystrup Gravel is no exception. Behind the loco shed outside Nystrup there is a small spot where a motley collection of old furniture enables tired or idle employees of Nystrup Gravel to catch their breath or a little nap and still getting paid… 

A place that invites to a rest in a busy work day. Two empty beer bottles on the bench indicates some recent pausing.
The scene is basically the result of a quick sweep through the spares box. Only minor shopping was needed. The bench is a leftover from a laser cut coach kit from Daniel Caso, the table from Tamiya (the M577 Amoured Command Post). After completing the set up, the table seemed a little under sized and I didn't glue it in place to better facilitate exchange with another item in the future. The beer crates used as improvised chairs are from Epokemodeller, while the chair and beer bottles are from Plus Models. Although the bottles doesn't match period Danish ones exactly I couldn't resist the temptation to add a few. All items are painted in acrylics and weathered with oil paints and pastel chalk.

Seen from the other side of the tracks. The loco shed is just out of the picture to the right.
Groundwork is done with different coloured sand picked up wherever I had the chance. Grass is primarily from Heki. The trees and bushes in the background are quickly home made ones. Dry leaves are represented by birch seeds picked up from our garden. Grass and ground cover will be refined later.

At the other end of the module I'm currently working on a wooden fence and grass planting is in progress around the bridge and stream.

Monday 22 October 2012

The Importance of Gravel

To estimate the role of Nystrup Gravel for the city of Nystrup and its population one has to take into account that the region where Nystrup is situated was primarily a farming region in the 1950´s. Most men and women had their daily outcome from crops and animals. How important farming and agriculture was to the Danish economy can be seen in the illustration below. A large part of what is labelled as industry in the illustration also owes its existence to farming. A good part of the Danish industry was refining agricultural products like meat and wheat into sausages and beer (just to mention two important and basic food products).
The Danish population and their employment status in 1940. From Hvem-Hvad-Hvor 1950.
What little industry has established itself in Nystrup in the first half of the fifties is mostly related to repairing and maintaining agricultural machinery and extracting stone, gravel or chalk. So when you meet a man in Nystrup there is an overwhelming chance that he works in farming or with stone and gravel.


Loco no. 5 pushing skips filled with one of the most important products for the city of Nystrup - gravel. 

Statistics from the late 1940´s mentioning 2.515 companies working with stone or chalk extraction employing some 25.000 people and contributing 166 mio a year to the Danish economy. It is worth noting that the companies on average were quite small - 10 employees each. From Hvem-Hvad-Hvor, 1950.
 If interested in seeing more of what the 'Hvem-Hvad-Hvor' comtained go to this Flickr-set.

Tuesday 16 October 2012

22. Internationales Feldbahntreffen

In the past few days I have been enjoying myself thoroughly in the eastern part of Germany exploring narrow as well as standard gauge railways and part of the German brown coal industry.

Each year enthusiasts that keep alive narrow gauge railways – almost all of them with an industrial connection – meet for the ‘Feldbahntreff’. A gathering of mostly continental, German speaking enthusiasts keep each other updated with their latest challenges and accomplishments. Apart from the networking and exchange of tips and tricks, a lot of train riding on the host society’s railway is on the programme.


The host this year was Waldeisenbahn Muskau. One of my favourite German railways with an immensely interesting history and three great lines radiating from it’s central hub at the town of Weisswasser. All in a beautiful wooded landscape. The volunteers and employees at Waldeisenbahn Muskau had put together a great programme and were perfect hosts. With WEM's gauge of 600 mm it is hard not to bring home some inspiration to one's own little railway. But gauge isn't all. WEM was built for much larger volumes of traffic and you won't see a Brigade-Lok on Nystrup Gravel. But perhaps an old Austro-Daimler?

99 3312-8 at the station in Weisswasser. A good example of the high standard of work at WEM.

The volunteers at WEM will not need to sit idle, awaiting their next task. They have plenty more wagons to work at - not mentioning maintaining a railway almost 20 km. long.
More images from the Feldbahntreff can be seen here.

Apart from the time devoted to the Feldbahntreff, a few of my fellow travellers from the Danish Industrial Railway Society and I decided to explore some of the remaining brown coal operations.  Not only to watch the standard gauge railways involved in the coal transport but also to gaze in awe over the colossal machines employed in the mining process and the extent to which the open cast mining is changing geography! In fact the Waldeisenbahn is having one of it’s lines amputated by the huge Nochten open cast mine. WEM plan to relay the line into areas not currently planned for mining.

A tracked 'Absetzer', conveyor belt for overburden and three seemingly very small bulldozers. They are not small, though, and the Absetzer isn't the largest machine in the open cast mine at Nochten.
Read more about the Geman brown coal industry and it's machines at Ostkohle.de and visit some of them at Ferropolis or Besucherbergwerk F60.

Back home I was welcomed by family and a new issue of 'Narrow Gauge and Industrial Railway Modelling Review' fresh from the print shop in Wales. And my vacation still lasts for almost a week. How lucky is one allowed to be?

Tuesday 9 October 2012

Speeder Details and Electronics (1/35)

Work on the speeder continues among the other modelling tasks at my desk. On the body I have primarily been working on the interior (bench, instrumentation and levers) and getting the roof started. 
Something you don't see too often: The wiring and fitting of decoder in the tight condition inside a 1:35 model. The Black Beetle out of focus to the right. The decoder is an ESU Lokpilot 4.0 Micro. I really like Ã¯t's small size!
I have also mounted the ESU-decoder and fitted lights with their associated wires. The grain of rice bulps are from a batch I bought from Micro-Mark in the US a few years ago. The bulps had a very powerful light at 12 V, so I fitted resistors to bring down the voltage to about 6 V. That took the light level to something more in line with my idea of dim lamps rather than floodlights on a super tanker. The speeder is my first model with lights and I can't wait to see it trundle back and forth on the gravel line in darkness. The decoder, resistors and wires are hidden under the central bench and is accessible by removing two screws and lifting the upper body of the model.

Testing the speeder after fitting of decoder and lights. Trundling round my portable test track in prototypical Decauville style the Black Beetle behaved well in cooperation with ESU-decoder. Not at all like a Tenshodo! Two bolts and nuts give weight to the assembly. When finished the speeder will be weighted down by more invisibly placed weights!
In the coming weekend I will touch neither knife nor glue, as I will be attending the '22. Internationales Feldbahntreffen' hosted by Waldeisenbahn Muskau. I am looking forward to nothing but narrow gauge trains for four days - and a beer or two in between. I love the wooded landscape around Muskau and Weiswasser and I really admire the work done by my German colleagues so I can hardly wait...

See the finished speeder.

Saturday 6 October 2012

"A Package from Paris" (1/35)

...said the postman as he handed me a small card board box. A resin kit and some figures had arrived from Blast Models of France two days after I ordered them.

The kit is one of those surprises that sometimes comes along. I knew that the French company U-Models were selling the well known kits of the 1:35 Billard-loco and Pechot-wagons (originally from 13'eme Dragon) but that they had released a Jung-locomotive was completely unknown to me. It didn't take long for me to find my credit card and place the order!

I'm checking the main parts of the 1:35 Jung kit just minutes after the arrival of the parcel.

Parts layout and assembly instructions from the kit.

I hope to be able to fit a BullAnt to power the model. I would like my model to be like a real Jung-loco as the producers themselves described it in 1938: "einfach im Aufbau und in der Bedienung, kräftig, unempfindlich, stets betriebsbereit".


You can find info and drawings on Jung-locos in 'Narrow Gauge and Industrial Railway Modelling Review' issues 50 and 51. More on Jung's production of locomotives on Jens Merte's website.


Friday 5 October 2012

From a Family Album (1/35)

On the shelves of Skovby Local Historical Archive I have found a lot of old family albums with photographs of everyday life. A few of them contains images from the owner's working life at Nystrup Gravel. A good source of photographs of both railway and interesting machinery. Not all of the images have taken the toll of time too well, but I think they convey some of the history of the company anyway. Most of the images are heavily overcrowded and it is clear that the colleagues are the main motif.

A train of loaded skips being pushed to the sorting facility. A quite unusual photo for a family album as no person or persons make up the central motif. Perhaps this is a company photo that has found it's way into a family album?
I have used a few other photos from family albums in an earlier post. I still hope to dig up an album from either the gravel company itself or maybe the director. It may take quite some time to find something good and having to leaf through hundreds of images of weddings, funerals, birthdays and new borns can be a little boring. In my own life family albums have also brought me much railway and modelling inspiration. Some of which I have mentioned in posts before.

One of many albums I have leafed through.


Sunday 30 September 2012

Director Holm's Opel Kapitän (1/35)

At the moment a lot of civilian cars are coming out from the large manufacturers of military models. Both Tamiya, Bronco and ICM have released cars that have ended up on my shelves (mostly awaiting assembly). As I write these lines, I see news of yet another Opel from ICM. This is one more reason I'm glad that I model in 1:35 scale. So much to choose from!

To many people at model railway exhibitions cars are more 'era defining' than the trains. Cars and lorries on my layout thus carry a large burden - defining the setting as 'first half of the 1950´s'. The Kapitän is an ICM kit of what the company calls a 'Kapitän Saloon, WWII German Staff Car'. See the kit's layout on Armorama and Wikipedia.de on the Kapitän. There is no military fittings so the car can be used in a non-military role without any rebuilding. The car is a typical ICM kit with a lot of small parts. The layout of parts is not without issues, as the upper body has to be assembled from many parts. This does not make the assembly/painting sequence easy to plan. Until now the worst issue I have found is the fit of the headlight/radiator grill assemby. It needs quite a lot of filler and sanding to blend in.
Basic chassis constructed. Only the most basic parts of the engine was used. I see no point in detailing an engine that can't be seen when the model is finished. The unused parts went into my collection of spare parts. Never throw anything away! Photo from before I added the bad fitting front part.
In the early fifties a lot of cars in Denmark were still pre-war models. Even those who were well off didn't have easy access to new cars, due to tight import restrictions. The director of Nystrup Gravel, Jørgen Holm, still drives his 1939 model Opel Kapitän. His car was moth balled during the war and although being from 1939 hasn't seen much use. Director Holm fancied a new American car, but didn't get permission to buy one. Holm wasn't alone. In 1949 not a single American car was allowed to be imported into Denmark. To most Danes the price of an American car was prohibitive anyway.

The model is surprisingly large and will fit the status of director Holm very well. A respected man and conservative member of the city council needs a respectable car.

'Technik im Dienst der Bequemlichkeit' (Technology in the service of comfort). Opel commercial from 1939 on the virtues of the Kapitän - notice the newly constructed German 'Auto Bahn'.
From http://storm.oldcarmanualproject.com/opelkapitan1939.htm
See progress on the car on this newer blog post

Thursday 27 September 2012

New Skips from Great Britain (1/35)

Six new Hudson skips are now in service at Nystrup Gravel. The skips are the newest skips at the company and acquired a few years after the war. Great Britain were in those years the primary supplier of things mechanical to Denmark.


The finished skips received a layer of black ('Chaos Black' from Games Workshop). I have found this paint to be excellent, not just as a primer, it also works fine as covering paint. The larger surfaces - primarily the sides of the skip bodies - were given a thin layer of black grey to give variation to the otherwise very dark skips. Gloss varnish were applied with air brush were the decals had to go. The company name on each end of the skips are from 'Skilteskoven' while the numbers are cobbled together from an Accurate Armour decal sheet. As I wanted the skips to have numbers in pretty much chronological order it took quite some planning and mixing of single digit decal cutouts. Not the easiest of tasks. As much as I like my rule to use materials from my spares box I will probably have decals designed next time I face a 'cut and assemble' decal task of similar size. A light weathering with acrylic and oil paint, pastel powders and matt varnish finished off the skips.

Decals in place and matt varnished for protection. Weathering of tubs' interior has started. On skip 47 I have fitted one of my home made coupling chains. A better representation of the real ones than my usual simple chain links of equal link size.

Basic weathering in place. All that remains to be done is to blend everything together with pastel chalk powder and  a little graphite for worn metal.

As will be apparent, the United Kingdom supplied a large part of Denmark's import of machinery. From the Danish year book 'Hvem-Hvad-Hvor 1950' (Who-What-Where). A most usefull series of books enabling one to look up basically every possible fact of Danish society dating back to 1935. The year book is still published. I wouldn't miss my complete collection for the world.
Overall this project was done quite quickly by my standards. From ordering to finished skips a mere month and a half went by. Not all my projects are like that - the Chevrolet-lorry took more than 7 years!

More images of the new skips here and here.

Friday 14 September 2012

Skips on the Assembly Line (1/35)

You may all wonder: 'How many skips can this little railway possibly find use for?' And yes, the question is valid. Three rakes of skips is pretty much what it takes to keep a production process to go uninterrupted. At any time during the work day one train of skips is in transit between the works and the pits, one train is being loaded at the pit face, while the last is being unloaded at the gravel works. As I had only two rakes of skips I needed a third for my little railway.

After the war's challenging gravel transports Nystrup Gravel needed to replace 10 old, worn out skips. Having found no useable skips at the auctions over old German equipment after the liberation, Nystrup Gravel was fortunate to receive brand new, imported skips from Great Britain. As Denmark had a huge export of agricultural products to the UK an equal valuable stream of industrial products flowed back to Denmark. Including Hudson skips. Read a short history of Robert Hudson Ltd.

A page from a Hudson catalouge. Here sourced from http://www.yorkshire.16mm.org.uk/BuiltinLeedsnew.html
In a recent post I told about the Hudson 'Rugga' skip I found in my collection, and how it made me acquire more 'Ruggas' from Slater's Plastikard. They have now been built in assembly line fashion. It really speeds up production and six skips are quickly built. Probably also an indication of a well designed and produced kit? Although the work was repetitive I liked that I was not challenged every other second to figure out how to produce a tiny part myself and find ways to attach it to the model. Here I could really put my brain on 'stand by' and just build.

Six skips fitted with wheel sets - and the spare wheel set that came as a surplus. After a bit of adjusting all 12 wheel sets were rolling freely, promising good running from the skips. The red table testifies that I was again modelling outside - this time in my family's summer cottage.

Ready for skip bodies! Adding the six parts on each skip that carry the skip body took no more than 1-2 minutes.

Drilling shallow holes at precisely the right spot is made easy with the supplied etched brass jig. 

Assembly accomplished. 1:35 scale figure for size comparison. Evidently the figure is not as far progressed as the skip. He still needs the huge pocket on the right thigh scalpelled off, new arms and a head. The figure comes from the Zvezda figure set 'WW 2 Soviet Tank Crew'.
The skips will now be painted black and fitted with decals proudly spelling out the full name of the gravel company 'Nystrup Stone and Gravel Company Ltd'. Left over decals from a military kit will be used for numbering. Weathering will be limited as the skips are portrayed as relatively new.


Sunday 9 September 2012

Bankes Bakelit's Ford V3000 (1/35)

Last time I wrote about the Ford lorry I had completed the construction. After a layer of primer I painted rear fenders, wheels and cab with Humbrol 14 gloss 'French Blue' and the floor of the load area Model Air 'Khaki Brown'. I airbrushed the sides of the cargo bay red with Vallejo 31. Floor and inner sides of the cargo bay were weathered and sealed with matt varnish. The chassis was weathered with oil paint and pastel chalk and also sealed with matt varnish. The tires where painted with Vallejo 168 'Black Grey'.

After some careful masking cab and the upper half of the doors where air brushed red. I found it a difficult, but funny, task. Unfortunately it didn't stay that way! My paint job ended in almost utter disaster as the paint crept under or through the masking tape. I managed to clean up most of the mess, but I still have that 'perfect lorry paint job' waiting for me somewhere in the future.

Lettering came from 'Skilteskoven' - my usual supplier of costum made decals. The little one-man business in Odense is celebrating it's 10th aniversery this year (and of course the owner has a 'real' job - you cannot live from making decals and signs for railway modellers in Denmark). On the cab doors the black lettering is placed on top of an orange rectangle cut from some left over decals from an old helicopter kit (remember: never throw anything away!). The license plates are from 'Skilteskoven' as well. Decal application was plain sailing. Decals from 'Skilteskoven' are nicely printed on thin decal film that responds well to my favorite decal solutions from Mr. Hobby.


Transporting barrels full of phenol for Bankes Bakelit. The Ford V3000 lorry is here seen crossing the viaduct taking the road to Ubehage over the 600 mm. gravel line.

A well kept Ford lorry from one of Nystrup Gravel's neighbours, Bankes Bakelit. It is easy to see that the drivers are concentrating their maintenance on cab and front, leaving the wooden load area much more to natural weathering.
The lorry is loaded with some very worn looking 200 l. barrels with chemicals for the production of bakelite. I lost the box years ago, but I think the barrels are from Tamiya.

How a break could have looked like in 1951 for the driver of one of the lorrys from Bankes Bakelit.
Despite the below average paint job I'm quite fond of my lorry. Now the company 'Bankes Bakelit' has been given a modelling tribute. Perhaps I can even create part of the factory complex as a background building on a future module?

Earlier posts on my Ford can be found on:

Another Ford lorry, here in the markings af the German Red Cross. A great model that would not look out of place in my collection wearing a more colourful livery and markings.
See more http://panzerserra.blogspot.dk/2012/09/ford-1941-panel-van-part-05-and-final.html