I'm currently rebuilding the factory building at Bankes Bakelit. Quite an accomplishment as I never managed to finish the first version of the building. The upgrade from card board mock up to foam board building was planned. Now the building has (due to the unforeseen intervention from good friends of Nystrup Gravel) progressed to laser cut 4 mm. MDF. In fact several friends came up with ideas for improving the building. I really like getting suggestions and advise. I consider it the main benefit of this little blog. Thanks a lot.
Per Møller Nielsen, the owner of
Epokemodeller, a small Danish producer of all sorts of useful accessories in scales from H0 to Gauge 1, offered to laser cut both walls and windows. Sketches with the main measurements were mailed and the finished parts delivered only a week later. I paid Per a small sum for the service, but surely the result merits the investment.
 |
| The building from Larsen's Toy Factory I'm using as inspiration for my bakelite factory. Workers beside a pile of the wooden toys they were making inside for more than 60 years. Too bad I can only build one end and a single row of windows. I can see that H0-modellers have one advantage over my 1:35 scale... |
I assembled the three main parts (front and sides) with white glue. The parts came chamfered and they fitted perfectly together. I added a small rear reinforcement of foam board. The major rear foam board wall of the building will be integrated with the internal structure and interior.
I filed the lower window edge to allow for the mounting of a window
sill. On the prototype the sills are quite prominent and I didn't want to
leave them out. The sills were fabricated from plastic card and painted a
rusty red to match the window frames, although you from the old photo
above can see that they originally were white.
The
outer walls of the building were covered with a layer of white glue that was worked with a short and stiff haired brush while drying. This gives the
wall a three dimensional structure which I think is necessary in
1:35 scale. After two layers of white paint I fitted decals with the company
name. I had those made years ago by my usual supplier of decals
'Skilteskoven' in Odense.
 |
| Ready for paint. The covering of dried white glue is vaguely visible. |
 |
| White paint added and decals fitted. Gloss varnish provided a smooth surface for the decals but it still took a considerable amount of decal solution to make the decals conform to the irregular surface. |
 |
| Foam board interior during construction. Grain of wheat bulbs test fitted - one in the front room right and two in the office left. |
 |
| Lights on in the front room. I plan to fit the lighting so I can turn on the light in each room individually. |
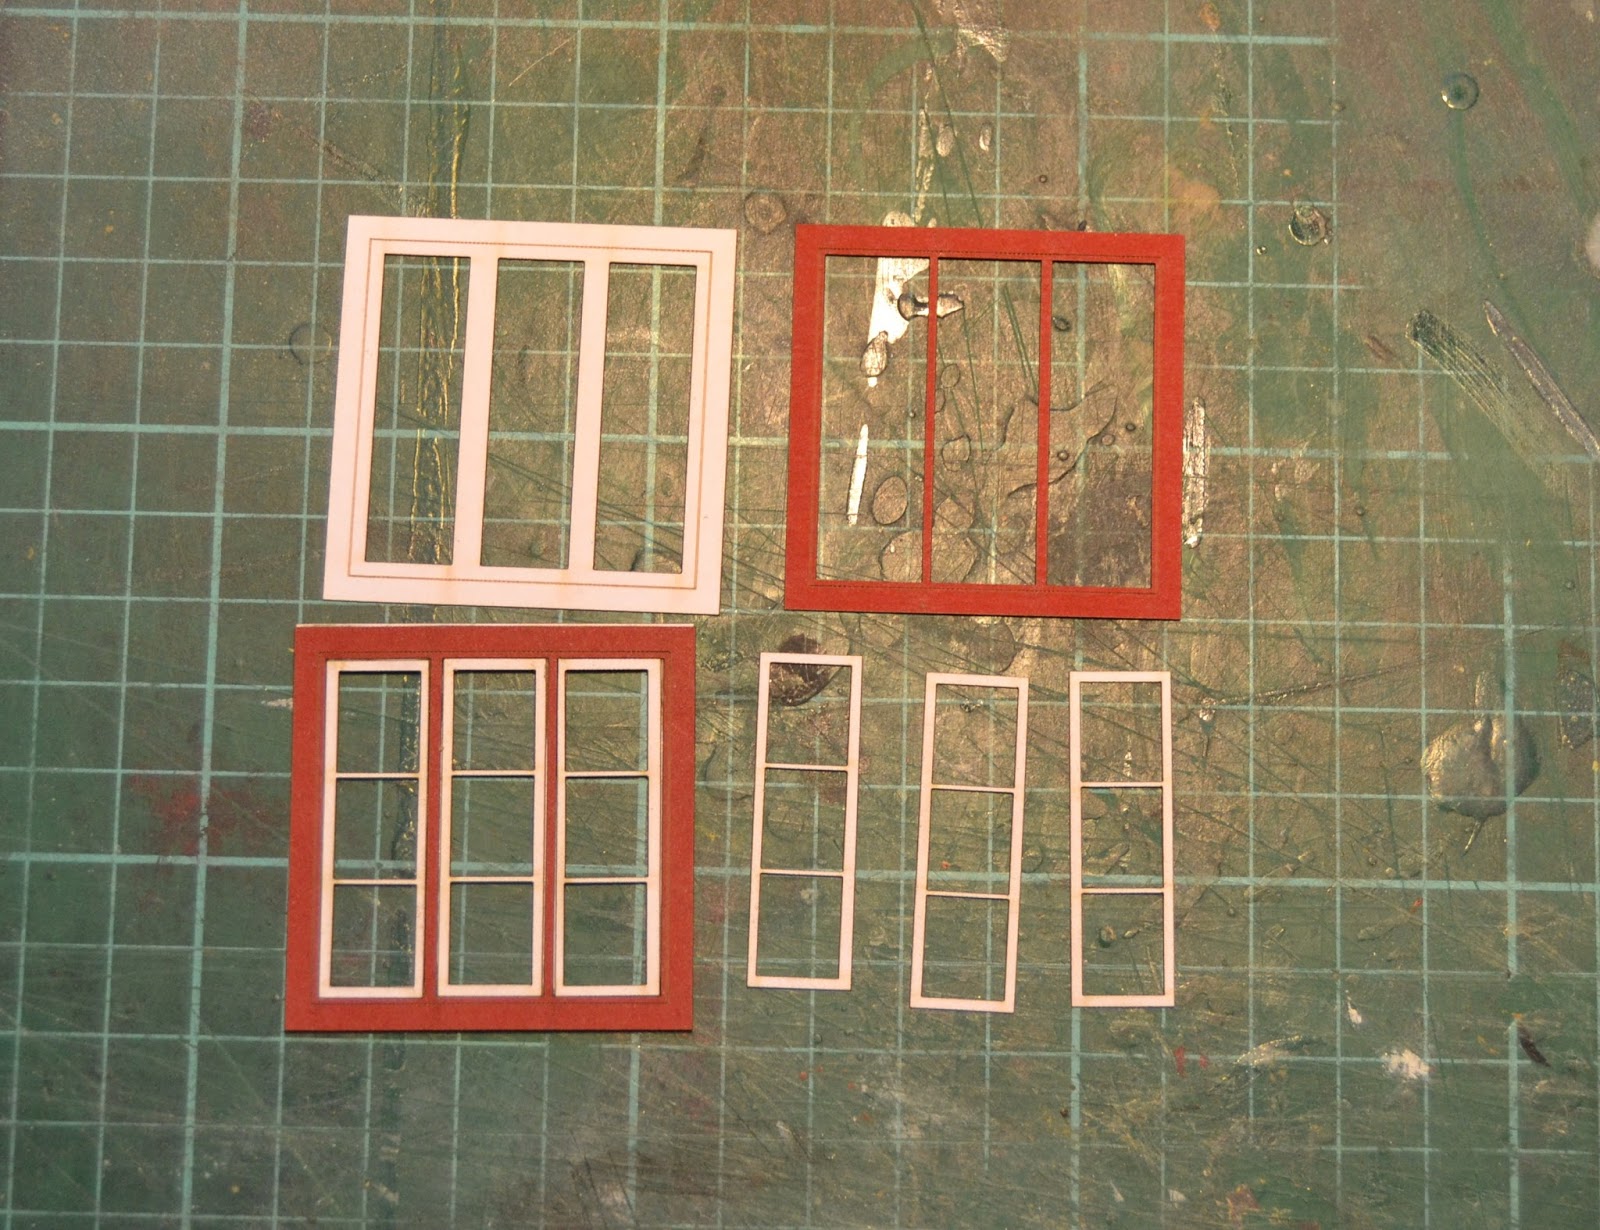
The windows were also laser cut by Per in thin card board. I carefully assembled the windows with thinned white glue. After the glue had dried, I gave the windows a cover of Vallejo matt varnish on both sides to protect the surface and provide a little extra stiffness.
 |
| Each window is made up from five parts. Here they are in company with an assembled window. Clear plastic card will be glued on the frames' rear as glass. |
The interior is currently being glued up from foam board in the form of a 'drawer' that can be pulled out of the building. Two rooms on the ground floor (office and front room with stove) and a single room with tanks and piping on the first floor.


No comments:
Post a Comment